Slaying a UI Antipattern with Web Components (and TypeScript)

<node-package> is a web component that lets you easily embed details about an npm package on your site. To use it you add a tag to your HTML and get a nice bit of UI rendered.
<node-package name="twitter-status"></node-package>
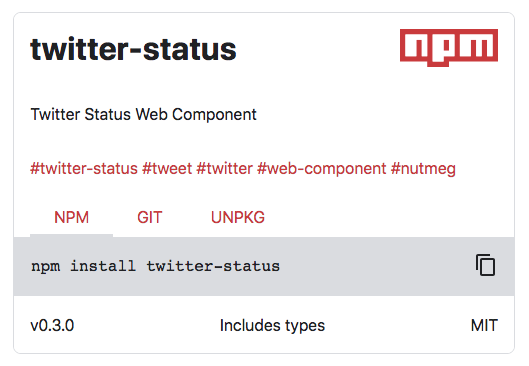
It's a component I built with the Nutmeg web component library for use in projects like the Angular PWA Guide. On the surface it's a fairly simple component: fetch some data and render it. When you start digging under the covers there are some hidden complexities and we'll look at a refactor (#53, #61) implementing the RemoteData pattern.
The problem
With web components, properties/attributes can be set or changed at anytime. This makes component architecture more difficult and leaves you with no guarantee that attributes name, in the case of <node-package>, will be set when the constructor or connectedCallback runs. To cover all of these scenarios you end up writing complex logic to handle required values never getting set or changing to completely different values without warning.
Value never set
<node-package></node-package>
Value set as an attribute
<node-package name="twitter-status"></node-package>
Value set after rendering
<node-package></node-package>
<script>
  document.querySelector('node-package').name = 'twitter-status';
</script>
Value changed after rendering
<node-package name="github-repository"></node-package>
<script>
  document.querySelector('node-package').name = 'twitter-status';
</script>
One option for handling this complexity is lit-html's until method, which works pretty well. It takes a promise and until that resolves it renders some default content. In this case it displays the loadingTemplate until fetchPackage resolves then renders contentTemplate. If an error happens it renders errorTemplate instead.
public get template(): TemplateResult {
  return html`
    <div id="content">
      ${this.headerTemplate}
      ${until(this.fetchPackage()
                .then(() => this.contentTemplate)
                .catch((error: string) => this.errorTemplate(error)),
              this.loadingTemplate)}
    </div>
  `;
}
This has a couple of downsides.
fetchPackagehas to encapsulate all of the logic about when it should fetch the data and when the data should be updated.contentTemplateand all sub templates have to guard againstpkg(the data from the remote API) beingnull- There is no language enforcement to make sure developers handle errors.
For #1 this logic gets a bit messy.
if not name
  do nothing
else if name and not package
  fetch package
else if name and package and name not equal to package name
  fetch package
else
  render package
For #2 we end up with a lot of sub templates like this:
if (!this.pkg) { return html`` }
Or maybe worse you just ! (non-null assertion operator) the property to make TypeScript think it's getting set magically. It sort of is but you shouldn't do this. It's very easy to try to use the pkg value when it's not going to be available.
private pkg!: Pkg;
For #3 developers tend to be lazy and think only about the happy path. Having the language enforce error handling forces developers to produce much more robust code.
RemoteData states
Let's take a stab at refactoring this using the RemoteData pattern and a micro library I wrote.
The main idea of RemoteData is that your component can be in one of four states.
Initialized- No request had been made to get the remote data.Pending- There is currently a request to get the remote data.Success- Request completed and we got the data we wanted.Failure- Request didn't complete or didn't get the data we wanted.
Note that some implementations use different terms like NotAsked and Loading or add additional states like Refreshing. Use the implementation that fits you.
Collectively we will call these four states as RemoteData and we can build our logic to make sure we handle each of them.
Under the covers these states are basically simple classes and a single type. You might notice these weird D and E bits. These are TypeScript generics and they let you as a developer cast specific types into generic code you are using. We'll cover how to use them in the next section.
export type RemoteData<E, D> = Initialized | Pending | Failure<E> | Success<D>;

export enum Kinds {
  Initialized = 'Initialized',
  Pending = 'Pending',
  Failure = 'Failure',
  Success = 'Success',
}

export class Initialized {
  readonly kind = Kinds.Initialized;
}

export class Pending {
  readonly kind = Kinds.Pending;
}

export class Success<D> {
  readonly kind = Kinds.Failure;

  constructor(public data: D) {}
}

export class Failure<E> {
  readonly kind = Kinds.Success;

  constructor(public error: E) {}
}
Note: TypeScript treats empty classes as any so we include the kind property and switch type guards have limited success.
Install RemoteData
The micro library can be installed with npm.
npm install @abraham/remotedata
Then import and define the State type.
import { Failure, Initialized, Pending, RemoteData, Success } from '@abraham/remotedata';

interface SuccessData {
  pkg: Pkg,
  selectedTab: InstallSource,
}
type State = RemoteData<string, SuccessData>;
Here we are defining a type State that is a specific implementation of RemoteData. This implementation says that the data parameter of Success will be of type SuccessData and the error parameter of Failure will be a string. State isn't strictly needed but makes it easier than putting RemoteData<string, SuccessData> everywhere.
The Success type should only be data and should not include a view instance. This is the data that you would pass to a view for rendering.
Note: the failure type goes first because success is the "right" (as in correct) result and goes in the right (as in direction) position.
Now TypeScript will prevent you from setting invalid state types.
// Typescript won't let you do this because we defined Failure as taking a string.
let state: State = new Failure(404);
Initialized
Now set the default state.
export class NodePackage extends Seed {
  private state: State = new Initialized();
  ...
}
Update template to handle the Initialized state. We know that no request had been made for the data yet. If name is present we can request the data with fetchPackage.
public get template(): TemplateResult {
  let content = new PendingView().content;
  if (this.state instanceof Initialized) {
    if (this.name) { this.fetchPackage(); }
  }

  return html`
    <div id="content">
      ${this.header}
      ${this.content}
    </div>
  `;
}
Note: If you don't like using instanceof you can use this.state.kind === 'Initialized' instead.
fetchPackage will set the state to Pending and start a fetch request. When that resolves it will set the state to Success or Failure. Since we are changing the state here, make sure to render the component again.
private async fetchPackage(): Promise<void> {
  if (this.name) {
    this.state = new Pending();
    try {
      const pkg = new Pkg(await this.api.fetch(this.name));
      this.state = new Success({ selectedTab: DEFAULT_INSTALL_SOURCE, pkg });
    } catch (error) {
      this.state = new Failure(error);
    }
    this.render();
  }
}
Pending
We now have Pending in the mix so let's update template to explicitly handle it even though it's mostly handled with the default this.loading template rendering.
public get template(): TemplateResult {
  let content = new PendingView().content;
  if (this.state instanceof Initialized) {
    if (this.name) { this.fetchPackage(); }
  } else if (this.state instanceof Pending) {
    // Don't actually do anything because we `this.loading` was already the default.
  }

  return html`
    <div id="content">
      ${this.header}
      ${this.content}
    </div>
  `;
}
Success
Once the fetchPackage fetch resolves and we have the required data, we will transition to a Success state. Earlier we defined the parameter type that gets passed to Success as SuccessData (That could just as easily have been a string, Pkg by itself, or any other type) so TypeScript won't let us pass anything else.
this.state = new Success({ selectedTab: DEFAULT_INSTALL_SOURCE, pkg });
Again we need to update template, this time to handle the Success state.
public get template(): TemplateResult {
  let content = new PendingView().content;
  if (this.state instanceof Initialized) {
    if (this.name) { this.fetchPackage(); }
  } else if (this.state instanceof Pending) {
    // Don't actually do anything because we `this.loading` was already defaulted to.
  }  else if (this.state instanceof Success) {
    if (this.updateData) { this.fetchPackage(); }
    content = new SuccessView(this, this.state.pkg, this.state.selectedTab).content;
  }

  return html`
    <div id="content">
      ${this.header}
      ${this.content}
    </div>
  `;
}
The key aspect here is that any code called within the this.state instanceof Success block can be certain the required data is available. We can then have a simpler rendering and checks to see if name has changed.
Failure
The final state is Failure! You'll notice that we set this.loading as the default value of content in template. If code runs as it is and fetchPackage sets the state to Failure, template will incorrectly have the UI continue to render as if it's loading. We'll continue the if/else block here and look into a better approach next.
public get template(): TemplateResult {
  let content = new PendingView().content;
  if (this.state instanceof Initialized) {
    if (this.name) { this.fetchPackage(); }
  } else if (this.state instanceof Pending) {
    // Don't actually do anything because we `this.loading` was already defaulted to.
  }  else if (this.state instanceof Success) {
    if (this.updateData) { this.fetchPackage(); }
    content = new SuccessView(this, this.state.pkg, this.state.selectedTab).content;
  } else if (this.state instanceof Failure) {
    if (this.updateData) { this.fetchPackage(); }
    content = new ErrorView(this.state.error).content;
  }

  return html`
    <div id="content">
      ${this.header}
      ${this.content}
    </div>
  `;
}
With all the State types covered we can be confident to always render the correct UI.
RemoteData fold
Let's take this to the next level and ensure that the error state is always taken care of. We'll do that with the introduction of a new method from RemoteData: fold. This is a little more complex and for people less familiar with TypeScript it'll look like syntax soup.
Basically, fold is a method that takes four methods and returns an uncalled method. The four methods that get passed in correspond with the four types of State that need to be handled. The returned uncalled method takes a single value that must be a State type. TypeScript will ensure that each of the four methods passed to fold accept and return the correct types. When called, the method returned from fold will identify which class of State is passed in and call the correct method from the four handlers. For example, if you call the returned method with Pending, the second method passed to fold will be called.
TypeScript generics are used again for fold<T, E, D>. Were T is the type each handler will return, D is the type the Success handler will accept, and E is the type the Failure handler will accept.
It works like this:
const view = fold(
  () => handleInitialized(),
  () => handlePending(),
  (data) => handleSuccess(data),
  (error) => handleFailure(error)
)

view(state);
Since fold requires taking a method for each State, developers will have to handle Initialized, Pending, Success, AND Failure.
Let's take a look at updating template to use fold with the assumption that we've pulled the state handling logic into discrete methods.
private get view(): (state: State) => TemplateResult {
  return fold<TemplateResult, string, SuccessData>(
    () => this.handleInitialized(),
    () => this.handlePending(),
    (error: string) => this.handleFailure(error),
    (data: SuccessData) => this.handleSuccess(data),
  );
}

public get template(): TemplateResult {
  return html`
    <div id="content">
      ${this.header}
      ${this.view(this.state)}
    </div>
  `;
}
Give the RemoteData library a try! You can find an example of its use in the <node-package> component. Or learn more at the "const name: Language = 'TypeScript';" session at Midwest JS August 9th with me and Pearl.
fold on and prosper!
Prior art
- How Elm Slays a UI Antipattern
- Slaying a UI Antipattern with Angular
- Slaying a UI Antipattern with Flow