JSON API Phase 4: Ember

Building an Ember App that connects to a JSON API server
- Phase 1: Setting up your projects
- Phase 2: Designing your API with Swagger and JSON API
- Phase 3: Developing an API with Express and Swagger
- Phase 4: Building an Ember App that connects to a JSON API server (this post)
Introduction
Welcome back to the Swagger/JSON-API Ember Tutorial. In Phase 1 we setup our projects. Then in Phase 2 we used Swagger to document and design our API. In Phase 3 we implemented the API server using Express and some Swagger tools. In this phase we're going to be creating an ember app with following routes:
/about— a sample about page/users— displays the list of all users/users/:id— displays a single user/users/:id/edit— edit an existing user/users/new/— create a new user
Note: Since our focus is integrating with our JSON API server, we won't be creating tests for our ember code. Ember, by default, adds ember-cli-qunit to the project. I recommend removing this package and replacing it with ember-cli-mocha and ember-cli-chai to match the testing setup of our api server. However, feel free to use qunit or or your favorite testing library. There are a number of great tutorials out there and the official documentation also goes over testing.
Challenge: If you'd like to challenge yourself, go ahead and write tests while you go through this tutorial
Dependencies
We'll be adding bootstrap to our project using the following commands:
# bootstrap 4 with SASS
ember install ember-bootstrap
ember generate ember-bootstrap --bootstrap-version=4 --preprocessor=sass
Your app.scss stylesheet should now look like this:
// app/styles/app.scss
@import "ember-bootstrap/bootstrap";
Application Template
To start off, let's remove the default content that's generated with our Ember project. Open the application template and remove the about-page component, the file should then look like this:
{{!-- app/templates/application.hbs --}}
{{outlet}}
About Page
Generate a simple about page using the route generator:
ember g route about
Add some basic markup to the page to give it something to show in the browser:
{{!-- app/templates/about.hbs --}}
<h1>About Page</h1>
<p>Hello world!</p>
{{outlet}}
Navigation Component
Now that we have actual content, we can build a navigation component:
ember g component nav-bar
Modify the template to show a Bootstrap NavBar containin a header and links to our pages:
{{!-- app/components/nav-bar.hbs --}}
{{#bs-navbar fluid=true as |navbar|}}
  <div class="navbar-header">
    {{navbar.toggle}}
    {{#link-to "index" class="navbar-brand"}}Ember JSON API Demo{{/link-to}}
  </div>
  {{#navbar.content}}
    {{#navbar.nav as |nav|}}
      {{#nav.item}}{{#nav.link-to "index"}}Home{{/nav.link-to}}{{/nav.item}}
      {{#nav.item}}{{#nav.link-to "about"}}About{{/nav.link-to}}{{/nav.item}}
    {{/navbar.nav}}
  {{/navbar.content}}
{{/bs-navbar}}
{{yield}}
Add the nav-bar component to application.hbs:
{{!-- app/templates/application.hbs --}}
<NavBar></NavBar>
{{outlet}}
Start the server
ember serve
If you open the site in a browser http://localhost:4200/, you should be able to navigate between the home page and our about page.
Ember Data and a User Model
We'll be using Ember Data to handle the local store of records and communication with the JSON API server. The project was generated with this package included, so there's nothing to install. By default, Ember Data uses it's JSONAPIAdapter. So, lets start off creating our User model:
ember g model user username:string firstName:string lastName:string
This should generate a model that looks like this:
// app/models/user.js
import Model, { attr } from '@ember-data/model';

export default class UserModel extends Model {
  @attr('string') username;
  @attr('string') firstName;
  @attr('string') lastName;
}
User Route
To view users, we can start off with creating a basic users route:
ember g route users
In the generated users route, we need to add the model method and query the data store fo all the users:
// app/routes/users.js
import Route from '@ember/routing/route';

export default class UsersRoute extends Route {
  model() {
    return this.get('store').findAll('user');
  }
}
Then we can add some markup to the template to display a table of users:
{{!-- app/templates/users.hbs --}}
<div class="table-responsive">
  <table class="table table-striped">
    <thead>
      <tr>
        <th>ID</th>
        <th>Username</th>
        <th>First Name</th>
        <th>Last Name</th>
      </tr>
    </thead>
    <tbody>
      {{#each @model as |user|}}
        <tr>
          <td>{{user.id}}</td>
          <td>{{user.username}}</td>
          <td>{{user.firstName}}</td>
          <td>{{user.lastName}}</td>
        </tr>
      {{/each}}
    </tbody>
  </table>
</div>

{{outlet}}
If you were to serve up the app in it's current state, you wouldn't see any data from our API server. That's because we've not configured the app to know what api to connect to.
JSON API Adapter
In order to connect to our JSON API server, we'll need to extend the default JSONAPIAdapter:
ember g adapter application
Simply provide the adapter with the location of our api server using the host attribute:
// app/adapters/application.js
import JSONAPIAdapter from '@ember-data/adapter/json-api';
import { pluralize } from 'ember-inflector'

export default class ApplicationAdapter extends JSONAPIAdapter {
  host = 'http://localhost:10010'
  pathForType(type) {
    return pluralize(type);
  }
}
The code above also instructs the adapter that the api server uses pluralized types for the paths.
JSON API Serializer
Since our api server is not using snake cased attributes, we'll also need to extend the default JSONAPISerializer:
ember g serializer application
The serializer provides a keyForAttribute method to transform, the default transform method converts camel cased keys into snake case. Since we want to keep things in camel case, we can simply return the key back untransformed:
// app/serializers/application.js
import JSONAPISerializer from '@ember-data/serializer/json-api';

export default class ApplicationSerializer extends JSONAPISerializer {
  keyForAttribute(key) {
    return key;
  }
}
Testing
We can now run a manual test to verify that our ember app is connecting to our API server:
# in one terminal, whose current working directory is the api project
yarn serve

# in another terminal, whose current working directory is the ember client project
ember serve
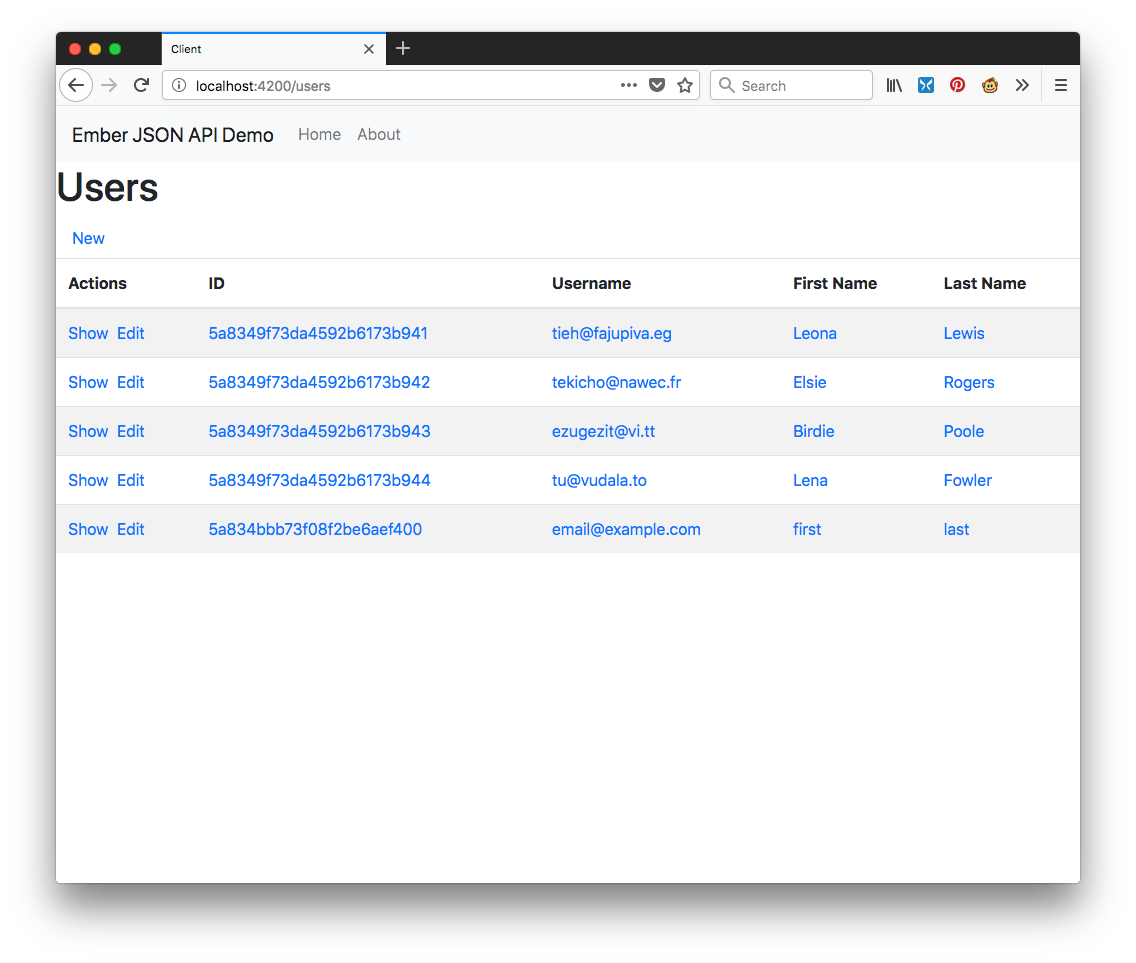
If you open the users route, it should look something like the screenshot below. This is assuming, of course, that your database is seeded with sample data. If the Users collection is empty in the Mongo DB, you'll only see the table headers:

More Routes
Now that we have a simple index route setup to view our users, let's generate the rest of our routes and some controllers:
# generate a base user controller
ember g controller users

# generate a `users/index` route and controller
ember g route users/index
ember g controller users/index

# generate a `users/new` route and controller
ember g route users/new
ember g controller users/new

# generate a `users/show` route and controller
ember g route users/show
ember g controller users/show

# generate a `users/edit` route and controller
ember g route users/edit
ember g controller users/edit
Users Index Route
Since we likely won't want to display the entire table of users for all the nested sub-routes, the new users/index route will provide the functionality we implemented in the users route above.
Replace the content in the users index controller with the following:
// app/routes/users/index.js
import UsersController from '../users';
export default UsersController;
Remove the table from the users template:
{{!-- app/templates/users.hbs --}}
{{outlet}}
Move the table into the users/index template:
{{!-- app/templates/users/index.hbs --}}
<div class="table-responsive">
  <table class="table table-striped">
    <thead>
      <tr>
        <th>ID</th>
        <th>Username</th>
        <th>First Name</th>
        <th>Last Name</th>
      </tr>
    </thead>
    <tbody>
      {{#each @model as |user|}}
        <tr>
          <td>{{user.id}}</td>
          <td>{{user.username}}</td>
          <td>{{user.firstName}}</td>
          <td>{{user.lastName}}</td>
        </tr>
      {{/each}}
    </tbody>
  </table>
</div>

{{outlet}}
Show User Route
We'll need to modify the router to add the user id to the path:
// app/router.js

// ...
Router.map(function() {
  // ...
  this.route('users', function() {
    // ...

    this.route('show', { path: '/:id' });

    // ...
  });
});
// ...
To show the appropriate record, we'll query the data store for the user record that matches the id parameter:
// app/routes/users/show.js
import Route from '@ember/routing/route';

export default class UsersShowRoute extends Route {
  model(params) {
    return this.get('store').findRecord('user', params.id);
  }
}
We can then use the model inside the template:
{{!-- app/templates/users/show.hbs --}}
<h1>{{this.model.firstName}} {{this.model.lastName}}</h1>
<p><b>Username:</b> {{this.model.username}}</p>
<BsNav @type="pills" as |nav|>
  <nav.item><nav.linkTo @route="users">Users</nav.linkTo></nav.item>
</BsNav>
{{outlet}}
The template above also includes a link back to the users index route for convenience.
As long as you're still serving the ember app, if you copy one of the IDs from the index route and append it to the end of the url, you should be able to manually navigate to the show user page at this point.
Edit User Route
We'll once again need to modify the router to define a path that includes the user's id and the edit endpoint:
// app/router.js
// ...
Router.map(function() {
  // ...
  this.route('users', function() {
    // ...

    this.route('edit', { path: '/:id/edit' });

  // ...
  });
});
// ...
For the Ember Route, we'll need to again query the store for the appropriate record. We'll also add actions to:
- save the record and return to the list of users
- cancel and return to the list of users
- check that there are no unsaved changes when transitioning away from the page
// app/routes/users/edit.js
import Route from '@ember/routing/route';
import { action } from '@ember/object'

export default class UsersEditRoute extends Route {
  model(params) {
    return this.store.findRecord('user', params.id);
  }

  @action
  saveUser(user) {
    user.save()
      .then(() => this.transitionTo('users'));
  }

  @action
  cancel() {
    this.transitionTo('users');
  }

  @action
  willTransition(transition) {
    let model = this.controller.get('model');
    if (model.get('hasDirtyAttributes')) {
      let confirmation = confirm("Your changes haven't saved yet. Would you like to leave this form?");
      if (confirmation) {
        model.rollbackAttributes();
      } else {
        transition.abort();
      }
    }
  }
}
In the users/edit controller, we'll setup actions that forward the save and cancel actions to the router:
// app/controllers/users/edit.js
import Controller from '@ember/controller';
import { action } from '@ember/object'

export default class UsersEditController extends Controller {
  @action
  cancel() {
    this.get('target').send('cancel');
  }

  @action
  saveUser(user) {
    this.get('target').send('saveUser', user);
  }
}
Now we can use a Bootstrap Form Component to display an html form with event listeners that will trigger our route actions:
{{!-- app/templates/users/edit.hbs --}}
<h1>Edit User</h1>

<BsForm @model={{this.model}} {{on "submit" (fn this.saveUser this.model)}} as |form|>
  <form.element @controlType="email" @label="Email" placeholder="Email" @property="username" />
  <form.element @controlType="text" @label="First Name" placeholder="first" @property="firstName" />
  <form.element @controlType="text" @label="Last Name" placeholder="last" @property="lastName" />
  <BsButton @type="primary" @defaultText="Submit" type="submit" />
  <BsButton @type="secondary" @defaultText="Cancel" {{on "click" this.cancel}} />
</BsForm>

{{outlet}}
New User Route
The new user route is very similar to the edit route. The only difference is that for the Ember Route's model method/hook, we'll build a new user record rather than pulling an existing one from the store.
// app/routes/users/new.js
import Route from '@ember/routing/route';
import { action } from '@ember/object';

export default class UsersNewRoute extends Route {
  model() {
    return this.store.createRecord('user');
  }

  @action
  saveUser(user) {
    user.save().then(() => this.transitionTo('users'));
  }

  @action
  cancel() {
    this.transitionTo('users');
  }

  @action
  willTransition() {
    this.controller.get('model').rollbackAttributes();
  }

}
The controller is identical to the edit controller:
// app/controllers/users/new.js
import Controller from '@ember/controller';
import { action } from '@ember/object';

export default class UsersNewController extends Controller {
  @action
  cancel() {
    this.get('target').send('cancel');
  }

  @action
  saveUser(user) {
    this.get('target').send('saveUser', user);
  }
}
The template is also identical:
{{!-- app/templates/users/new.hbs --}}
<h1>New User</h1>

<BsForm @model={{this.model}} @formLayout="horizontal" {{on "submit" (fn this.saveUser this.model)}} as |form|>
  <form.element @controlType="email" @label="Email" placeholder="Email" @property="username" @required="true" />
  <form.element @controlType="text" @label="First Name" placeholder="first" @property="firstName" @required="true" />
  <form.element @controlType="text" @label="Last Name" placeholder="last" @property="lastName" @required="true" />
  <BsButton @type="primary" @defaultText="Submit" type="submit" />
  <BsButton @type="secondary" @defaultText="Cancel" {{on "click" this.cancel}} />
</BsForm>

{{outlet}}
Wrapping Up
Now that we have all the routes implemented, we can make some modifications to the user index template and polish it up a bit:
{{!-- app/templates/users/index.hbs --}}
<h1>Users</h1>
{{!-- Add Navigation to the New User route --}}
<BsNav @type="pills" as |nav|>
<nav.item><nav.linkTo @route="users.new">New</nav.linkTo></nav.item>
</BsNav>
<div class="table-responsive">
<table class="table table-striped">
<thead>
<tr>
{{!-- Add an Actions column--}}
<th>Actions</th>
<th>ID</th>
<th>Username</th>
<th>First Name</th>
<th>Last Name</th>
</tr>
</thead>
<tbody>
{{#each @model as |user|}}
<tr>
{{!-- Add Navigation to the Show and Edit routes --}}
<td>
<LinkTo @route="users.show" @model={{user}}>Show</LinkTo>
<LinkTo @route="users.edit" @model={{user}}>Edit</LinkTo>
</td>
{{!-- wrap the user's data in a link to the Show route --}}
<td><LinkTo @route="users.show" @model={{user}}>{{user.id}}</LinkTo></td>
<td><LinkTo @route="users.show" @model={{user}}>{{user.username}}</LinkTo></td>
<td><LinkTo @route="users.show" @model={{user}}>{{user.firstName}}</LinkTo></td>
<td><LinkTo @route="users.show" @model={{user}}>{{user.lastName}}</LinkTo></td>
</tr>
{{/each}}
</tbody>
</table>
</div>
{{outlet}}
You should now be able to serve up both the Ember client and API server, and be able to create and modify users.
# in one terminal, whose current working directory is the api project
yarn serve

# in another terminal, whose current working directory is the ember client project
ember serve
You've done it! Before you lies an API server and an Ember app. Phase 1 set up the projects. Phase 2 stepped through designing the API with Swagger and JSON API. Phase 3 implemented the API with Express and Swagger. And finally, Phase 4 constructed an Ember App to connect to the JSON API server. If you'd like you can check out my code on Github:
Until next time, have fun coding!